Homework 1
For this first homework, we were responsible for learning a basic working knowledge of the HTML, CSS, and Markdown languages. In the course of this, the setting up of a github repository was carrried out as seen in the link below. Throughout the homework, we were practicing the use of various essential git commands. Furthermore, the site demo links to a set of simple webpages meant to showcase the use of HTML and CSS. The styling of the pages was carried out using the common package Bootstap - a CSS and Javascript library good for page layouts - as well as our own mini CSS file for manual style control.
Homework 1 Links
Part 1: Downloading Git, Using an account on GitHub to create a repository
I first downloaded the command line version of the Git version control system from this site and selected the appropriate options as part of the setup process. Git bash with Linux commands was used to setup the respository in the following manner:
First, I created and setup an empty Git repository on Github following directions from here This was followed by opening Git bash, creating a local project in the appropriate folder, navigating to it, and executing these command to initialize the local directory on my machine as a Git repository:
git init
My project files were then added to this new local repository via:
git add .
With this staging accomplished. I was ready for my first commit:
git commit - m "First commit"
Next, I went to my GitHub repository and retrieved my new repository’s remote repository URL Then, back in the command prompt, I added the url as it was needed to determine where my local repository would be pushed to and subsequently verified it:
    git remote add origin https://github.com/No-one-alone/no-one-alone.github.io
    git remote -v
Finally, I pushed my project files and any changes to the repository on my GitHub account:
git push origin master
I would check the status of the working tree and its relation to the local repository and my Github account via:
git status
Overall, this sequence of commands:
    git add .
    git commmit -m "some description of change made"
    git push origin master
was used to repeatedly update the GitHub repository as changes and additions were made to the project over time.
To pull the GitHub repository back to my local repository, I used:
git pull origin master
But only after checking that there was nothing to update from my end.
Also, at some point, I had configure the local repository with:
    git config --global user.name "Khorben Boyer"
    git config --global user.email kboyer12@mail.wou.edu
Part 2: Downloading Visual Studio IDE, Visual Studio Code, Bootstrap, and GitHub Pages
I then downloaded the Visual Studio IDE from here followed by Visual Studio Code from this site. After setting these up, I downloaded Bootstrap version 4 - the open source toolkit for HTML, CSS, and Javascript - from here. Finally, at a later point, I enabled the GitHub Pages feature on my GitHub account under the settings tab to allow for automatic serving of my created pages from my repo.
Part 3: Coding the Project
As per the assignment specifications, I created a primary landing page, a linked CS 460 landing page, and the Homework #1 blog page itself after choosing to use markdown language. The actual webpage portion of the assignment was created using separate HTML and CSS files.
Part 3.1: HTML
I worked primarly on the webpage portion first starting with some standard beginning HTML code observed from this site and linking in the particular bootstrap CSS files I needed along with my own css file as seen here.
<!--This my file for the Home web page for Homework#1 of CS 460-->
<!--Date finished: 10/1/2018-->

<!doctype html>
<html lang="eng">

       <!-----bootstrap part-->
       <link rel="stylesheet" href="../css/bootstrap.min.css">

       <!----my version of bootstrap css stuff----->
       <link rel="stylesheet" type="text/css" href="styles.css">
    <head>
        <h1>
            Khorben's Past Works
        </h1>
        <meta charset="utf-8">
        <meta name="viewport" content="width=device-width, initial-scaled=1">

    </head>
I added my navbar or menu for the webpage via the following code.
Navbar setup
<nav class="navbar navbar-expand">
            <div class="container-fluid space">
                <ul class="nav nav-tabs">
                    <ul class="navbar-nav>">
                        <li class="nav-item">
                            <a href="index.html">Home</a>
                            <a href="about.html">About</a>
                            <a href="pov_ray_work.html">POV-ray work</a>
                            <a href="math_senior_project_work.html">Math Senior Project Work</a>
                            <a href="contact.html">Contact</a>
                        </li>
                    </ul>
                </ul>
            </div>
        </nav>
The html code above was then replicated another 4 times to create 5 html files in total:
    index.html
    about.html
    pov_ray_work.html
    math_senior_project_work.html
    contact.html
A complete example of the coding for a page can be seen with about.html for the About page:
<!--This my file for the About web page for Homework#1 of CS 460-->
<!--Date finished: 10/1/2018-->

<!doctype html>
<html lang="eng">

    <!-----bootstrap part-->
    <link rel="stylesheet" href="../css/bootstrap.min.css">

    <!----my version of bootstrap css stuff----->
    <link rel="stylesheet" type="text/css" href="styles.css">
    <head>
        <h1>
            Khorben's Past Works
        </h1>
        <meta charset="utf-8">
        <meta name="viewport" content="width=device-width, initial-scaled=1">
    </head>

    <!--Work Comment: navbar structure was informed by help from fellow students-->
    <body>
        <nav class="navbar navbar-expand">
            <div class="container-fluid space">
                <ul class="nav nav-tabs">
                    <ul class="navbar-nav>">
                        <li class="nav-item">
                            <a href="index.html">Home</a>
                            <a href="about.html">About</a>
                            <a href="pov_ray_work.html">POV-ray Work</a>
                            <a href="math_senior_project_work.html">Math Senior Project Work</a>
                            <a href="contact.html">Contact</a>
                        </li>
                    </ul>
                </ul>
            </div>
        </nav>

        <div class="background">
            <div class="container">
                <div class="content">
                    <h2>
                        Statement of Intent
                    </h2>
                    <p>
                        "I have been at WOU for over 6 years.
                        In that time, I have taken many classes, met with many instructors, and worked on many projects.
                        While all have been conducive to my growth as a student,
                        there are some of particular significance to my mind with regards to how
                        they stretched what I thought I could do or accomplish. The works referenced
                        above are examples of just these sorts of projects."
                    </p>
                    <div class="row">

                            <div class="column">
                            <h2>
                                    My Majors
                            </h2>
                            <ol start="1">
                                <dt>Mathematics</dt>
                                <dt>Computer Science</dt>
                                <dt>Economics</dt>
                            </ol>
                            </div>
                            <div class="column"> <h2>
                                    My Interests
                            </h2>
                            <ol start="1">
                                <dt>Machine Learning</dt>
                                <dt>Artificial Intelligence</dt>
                                <dt>Applied Mathematics and Statistics</dt>
                            </ol>
                        </div>
                    </div>
                </div>
            </div>
        </div>
    </body>
</html>
The above code block also shows our implementation of an unordered list “ul” and an ordered list “ol”. It also supports a single column and multi-column page via use of “row” and “column”.
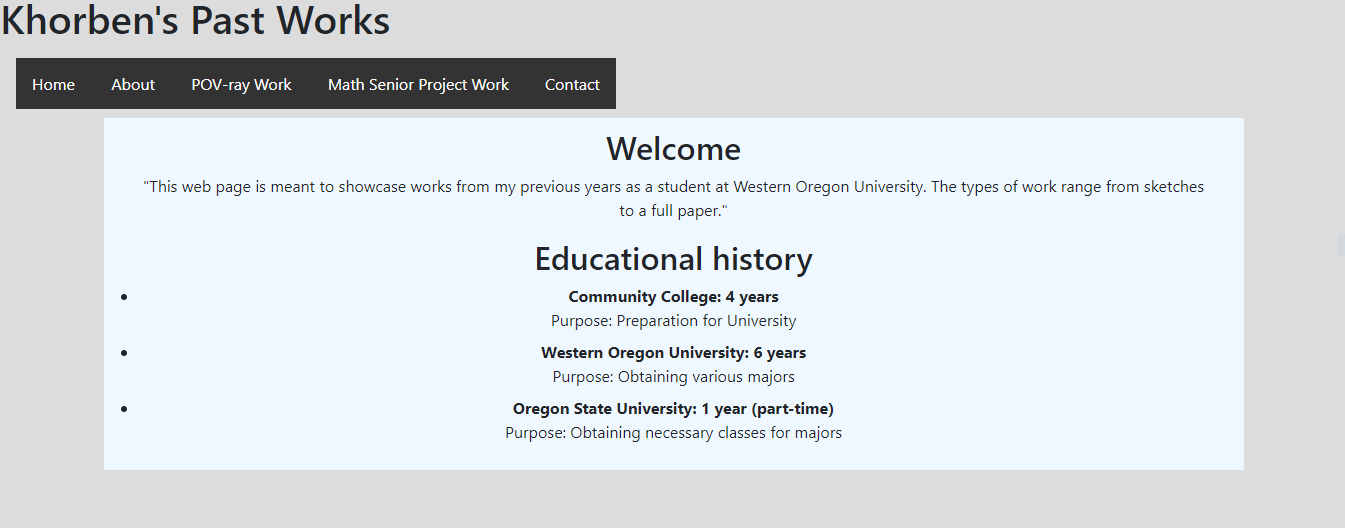
In addition, I implemented a description list “dl” on the Home page in this manner.
<div class="background">
            <div class="container">
                <div class="content">
                    <h2>
                        Welcome
                    </h2>
                    <p>
                        "This web page is meant to showcase works from my previous years as a student at Western Oregon University.
                        The types of work range from sketches to a full paper."
                    </p>

                    <h2>
                            Educational history
                    </h2>

                    <dl>
                        <dt>Community College: 4 years</dt>
                        <dd>Purpose: Preparation for University</dd>
                        <dt>Western Oregon University: 6 years</dt>
                        <dd>Purpose: Obtaining various majors</dd>
                        <dt>Oregon State University: 1 year (part-time)</dt>
                        <dd>Purpose: Obtaining necessary classes for majors</dd>
                    </dl>

                </div>
            </div>
        </div>
As for implementing the table, I constructed it on the Contact page using the following code.
<div class="background">
                <div class="container">
                    <div class="content">
                            <h2>
                                    My contact details
                            </h2>
                        <table class="table table-hover">
                            <thead>
                                <tr>
                                    <th>
                                        First Name
                                    </th>
                                    <th>
                                        Middle Initial
                                    </th>
                                    <th>
                                        Last Name
                                    </th>
                                    <th>
                                        University
                                    </th>
                                    <th>
                                        Email
                                    </th>
                                </tr>
                            </thead>
                            <tbody>
                                <tr>
                                    <td>
                                        Khorben
                                    </td>
                                    <td>
                                        A.
                                    </td>
                                    <td>
                                        Boyer
                                    </td>
                                    <td>
                                        Western Oregon University
                                    </td>
                                    <td>
                                        kboyer12@wou.edu
                                    </td>
                                </tr>
                            </tbody>
                            <tbody>
                                <tr>
                                    <td>
                                        Khorben
                                    </td>
                                    <td>
                                        A.
                                    </td>
                                    <td>
                                        Boyer
                                    </td>
                                    <td>
                                        Oregon State University
                                    </td>
                                    <td>
                                        boyerkh@oregonstate.edu
                                    </td>
                                </tr>
                            </tbody>
                        </table>
                    </div>
                </div>
            </div>
Part 3.2: CSS
Per requirements we also had to create our own styles.css file with at least several classes. This code block shows the initial part of the css program where we have used CSS to set the background color for the entire webpage site, the alignment of the text in the header and in the main page, and the color of the box in which text or images was contained.
/* This is my own CSS style sheet file for Homework#1 of CS 460 at WOU
   Date finished: 10/1/2018 */

/*This sets the background color of all of the webpages*/
body{
    background-color: gainsboro;
}

/* This center aligns the text in the headers of the pages.*/
#header{
    text-align: center;
}

/* This sets the color background of the containders within the webpage
   e.g. the text and image blocks*/
.container{
    width: 100%;
    background-color: aliceblue;
}

/* This center aligns the text in the webpages*/
.container-fluid{
    text-align: center;
}
/* This provides additional control of padding around the text in the webpages*/
.content{
    padding-left: 0%;
    padding-right: 0%;
    padding-top: 1%;
    padding-bottom: 1%;
    text-align: center;
    padding: 10px 20px;
    }
To format images, I used the following class and style settings.
/* This formats and controls how the images are arranged and displayed in the webpages*/
img{
    width: 100%;
    height: auto;
    width: auto;
    padding-top: 1%;
    padding-bottom: 1%;
    padding-left: 1%;
    padding-right: 1%;
    margin-left: auto;
    margin-right: auto;
    }
Formatting the navbar involved using the classes and specified styling seen here.
/* The code block below is responsible for formating the navbar of the webpages */

/* This formats unordered lists */
ul {
    list-style-type: none;
    margin: 0;
    padding: 0;
    overflow: hidden;
    background-color: #333;
}

/* This formats item lists */
li {
   float: left;
}

/* This formats item list elements */
li a {
    display: inline-block;
    color: white;
    text-align: center;
    padding: 14px 16px;
    text-decoration: none;
}

/* This provides the hover selection color for the contact webpage */
li a:hover {
    background-color: #111;
}
Lastly, I controlled numbered list display, figure placement, column formatting, and column behavior with the css code seen below.
/* This controls the display of numbered lists*/
dt{
    display: list-item;
    marker: none;
}


/* This fixes a figure in place */
figure {
    position: fixed;
}


/* This controls formatting of columns on the About webpage */
.column {
    float: left;
    width: 50%;
}


/* This makes the columns on the About webpage stack when the screen is made too narrow */
@media screen and (max-width: 600px) {
    .column {
        width: 100%;
    }
}
Part 3.3 Markdown
Now, we note the markdown code that was used to build the primary landing page, the CS 460 landing page, and this homework#1 blog page as well. Specifically, these are the elements of the language that I have used so far.
# Header 1
## Header 2
### Header 3
1. This is an item on a ordered list
2. This is an item on a ordered list
> This is a block quote
A [link](http://example.com)
 <-- inline image.
"```" <-- ignore the quotes
This is a
block of
code
"```" <-- ignore the quotes
Part 3.4: Final results
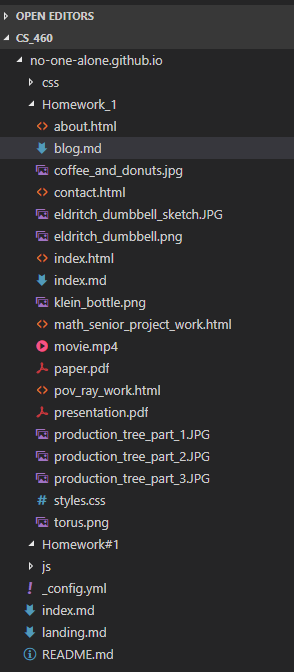
Next, this shows how the overall file structure of my project was organized.
Finally, we have a picture of the actual completed web page.
Overall, this was an interesting experience in creating webpages and working with HTML, CSS, markdown, and Git. As for the webpages themselves, I think they could look better, but given the time constraints, I am satisfied with what was achieved.